• English EN Italiano IT

Chromotherapy in brief

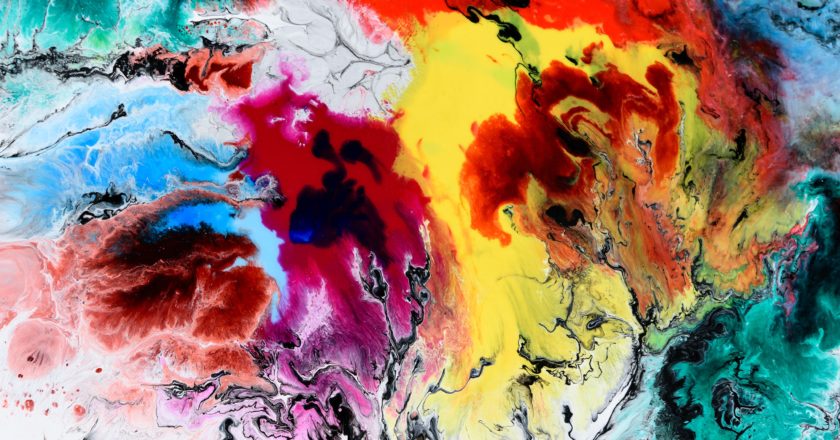
Colour is a phenomenon which surrounds us and it is often taken for granted. Just think for one second about the wonder of the rainbow and the awe-inspiring spectacle of the nothern lights. Colours are the visual part of what is known as the electromagnetic spectrum, that comprises of different kinds of energy waves which range from radio waves (the longest) to cosmic energy waves (the shortest).

We also know that light is composed of colors. Along with colors, light also consists of chemical and emotional elements since it emits heat, electricity and magnetism. Light, along with its component colours, can be used for healing the mind, body and spirit. This is the basic principle behind Chromotherapy (=colour therapy). But the rediscovery of colour used as a therapy is still in its early states, as at the beginning of the Nineteenth Century Chromotherapy was temporarily replaced by allopathic medicine due to the discovery of new drugs and advances in surgery.

It is common knowledge that white light is made up of all the colours. One way of experiencing this is to shine light through a prism, which refracts the light, splitting it into the multi-coloured band known as the colour spectrum. This is because each of the colours has its own angle of refraction (they are red, orange, yellow, green, turquoise, blue, indigo, violet and magenta). Each of these colours has its own wavelength and sound frequency ranging from the longest wavelength and lowest sound frequency of red, to the short wavelength and highest sound frequency of magenta.

All the colours of the spectrum have a complementary colour, which is their opposite in the colour wheel, and they are always used for a treatment, as they tend to look balanced and brighter when they are next to each other.

Following on from the electromagnetic spectrum we know that each colour has also its own vibration, so by using colour on its own or with another therapy, we can maintain or change the vibrations of the body to a frequency which stimulates health and harmony. This because the frequency changes in the case of disease.

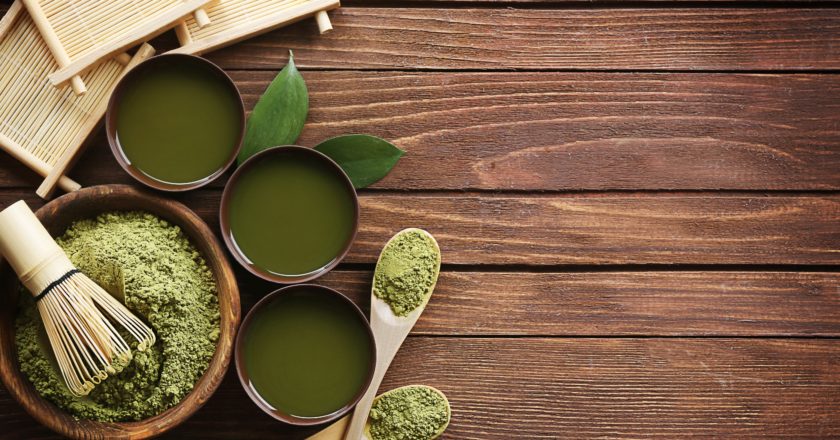
There are many ways to use these colours, such as coloured gem stones but you can easily wear colourful cloths, paint your home in specific colours or use coloured lamps and furniture. It’s up to you!

RED — COMPLEMENTARY COLOUR TURQUOISE
Red is a primary colour, which means that it cannot be produced by mixing any other colours. It is the colour with the longest wavelength and lowest sound frequency and, like all the other colours, it ranges from a very deep to a very pale red. It is a powerful energizer and stimulant, related to the masculine energy. If it is used in excess, it can cause aggression and sometimes restlessness. Red is the symbol of life, strength and vitality and helps to ground us, as it is connected to the base chakra and the gonads and reproductive cycle (great for the treatment of infertility). It is the colour to increase energy, raise body temperature and improve circulation and is therefore a colour of choice to use in cases of low blood pressure, anaemia and iron deficiency. When used with turquoise, red can help counteract infections and pneumonia and alleviate constipation. When red is mixed with white, it produces rose pink, the colour of spiritual love. Rose pink can be used in conjunction with violet for a broken heart. Violet restores dignity and self-respect and rose pink fills the person with spiritual love. Red should NOT be used when there is anxiety, emotional stress, high blood pressure or asthma.

ORANGE — COMPLEMENTARY COLOUR BLUE
Orange is a combination of red and yellow, thereby influencing both physical vitality and intellect. Related to the adrenals glands, it is the symbol of the feminine energy of creation. This is the colour of joy, the colour of dance, and as such is good for treating depression. Its antispasmodic effect works in cases of muscles spasms and cramp. It is also used in cases of kidney stones, gall stones, or for colds, underactive thyroid and bronchitis, fatigue or exhaustion.

GOLD — COMPLEMENTARY COLOUR INDIGO
Gold is the colour of wisdom and is indicative of high spirituality. In healing, this colour is only used with its complementary colour indigo, and for energising the body at the end of the treatment.

YELLOW — COMPLEMENTARY COLOUR VIOLET
Yellow is one of the three primary pigment colours and it is related to the solar plexus chakra which governs the pancreas, controls the digestive system and helps to purify the body through its eliminating action on both the liver and the intestines. The yellow rays carry positive, magnetic currents which are inspiring and stimulating. These rays strengthen the nerves, stimulate the intellect and activity the motor nerves in the physical body, thereby generating energy in the muscles. This colour is used to treat partial or complete paralysis, diabetes, indigestion, fractured or broken bones and all arthritic conditions. Yellow works on the skin by improving its texture, cleansing, healing scars, and helping conditions such as eczema and psoriasis.

GREEN — COMPLEMENTARY COLOUR MAGENTA
Green is a combination of yellow and blue. Yellow being the last colour on the magnetic side of the spectrum and blue, the first on the electrical side, green is the colour of balance. It is the dominant colour of the heart chakra and has the power to harmonise the yin and yang in the body. It also has a harmonising effect on three aspects of a human being, namely body, mind and spirit. Green also possesses antiseptic properties, enabling it to be used in cases of infection. It also has the ability to detoxify, which makes it invaluable for use on a toxic liver and it is useful in constipation, shock and certain heart conditions.

TURQUOISE — COMPLEMENTARY COLOUR RED
Turquoise is a combination of blue and green. It is related to the thymus gland and located close to it. The thymus gland is part of our immune system, therefore turquoise is a good colour to use to strengthen this.  Turquoise has the ability to calm, making it an excellent colour to use for nervous tension.

BLUE — COMPLEMENTARY COLOUR ORANGE
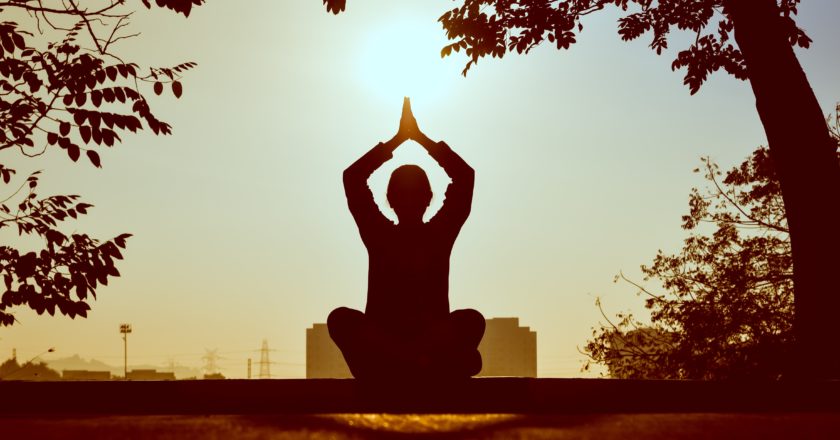
Blue is the dominant colour of the throat chakra. Like red, it is a primary or pure colour. But unlike red, which acts as a stimulant, blue has a relaxing and expanding effect, and is used on asthmatics. This is because it is symbioses tranquillity, peace, inspiration and devotion. Blue is an excellent colour for healing and meditation. It is also a good colour to wear during pregnancy. The throat chakra is the centre of communication and creativity. Those people who communicate with difficulty, or work mainly with their intellect, will benefit from treatment with the blue ray. Other disorders which respond well to blue are tension, fear, insomnia, anxiety, jaundice, diarrhoea and mastitis. However an excess of blue can cause depression.

INDIGO — COMPLEMENTARY COLOUR GOLD
This colour is a combination of blue and violet and is related to the brow chakra. It is associated with the mind, eyes and ears, and therefore it is used for cataracts and sinus problems. It is a strong painkiller and has antiseptic properties. Indigo, applied with its complementary colour gold, is used for headaches, neuralgic pain, insomnia, eye strain, angina, muscular strains, hepatitis, inflammation and sciatica.

VIOLET — COMPLEMENTARY COLOUR YELLOW
This colour is related to the crown chakra and pertains to spirituality, self-respect and dignity. It is very beneficial to psychological disorders such as schizophrenia and manic depression. It also helps sciatica, diseases of the scalp and all disorders connected with the nervous system.

MAGENTA — COMPLEMENTARY COLOUR GREEN
Magenta is composed of red and violet and is associated with release or letting go. On a mental level infact, magenta enables us to let go of ideas and thought patterns which have become irrelevant. Emotionally, it helps us to let go of old feelings which are preventing us from moving forward. On the physical level, it leads us to relinquish physical activities which we have outgrown. Magenta is beneficial in tinnitus, benign cysts and detached retinas.


Focus on: The Crown Chakra

Sanskrit name: Sahasrara – thousand petal
Element: No element, or thought
Color: Violet or white
Shape: Round scullcap
Petals of the lotus: One thousand
Rights: To know and to learn
Endocrine gland: Pineal gland
Physical association: Central nervous system, cerebral cortex
Psychological function: Awareness, understanding
Challenge: Attachment
Plane: Truth, reality
Planets: Uramis
Incense: Myrrh
Herb: Gotu Kola


The Crown chakra, known as Sahasrara in Sanskrit, is the seventh chakra. It sits like a crown, at the top of the head or slightly above the head, radiating upwards, hence its name.

The meaning of its Sanskrit name is “thousand petals”, as its symbol is composed of a circle and a thousand petals of a lotus flower. This chakra is most commonly represented with the color white, although it can also be pictured as deep purple. The auric color of crown chakra energy can also be seen as gold, white, or clear light.

It is primarily associated to the pineal gland, and to the pituitary gland and the hypothalamus, which work in pair to regulate the endocrine system. Because of its location, the crown chakra is closely associated with the brain and the whole nervous system. Also, because it is located centrally at the top of the head, Sahasrara gives us access to higher states of consciousness as we open to what is beyond our personal preoccupations and visions.

Infact, the function of the Crown chakra is driven by consciousness and gets us in touch with the universal. Its energy allows us to experience mystical oneness with everyone and everything in nature. The “way of the Crown chakra” is the way of going beyond the limits of your own ego, knowing that all of creation is interconnected at a fundamental level. The challenge of this chakra is to liberate the spirit, open to the divine, and at the same time stay firmly rooted deep in the ground, as energetically, it has a connection with the first chakra, as they both are at the extremities of the chakra system.

As we are immersed in the energy of Sahasrara, we feel a state of blissful union with all that is, of spiritual ecstasy, allowing us to access to the upmost clarity and enlightened wisdom. The quality of awareness that comes with it is universal, transcendent, and it makes us feel present, conscious, aware ofthe main connection and free from our limiting patterns.

A deficiency in the Crown chakra tends to cause subtle, systemic problems. These include: depression and mental fog, chronic fatigue, migraines and other chronic headaches, greed and materialism. On the other hand, an excess of energy in the seventh chakra can also cause problems including: sensitivity to light and sound, neurological or endocrine disorders, boredom and frustration, a sense of unearned accomplishment.

An unbalanced Crown chakra can also play a role in dementia, learning disabilities, comas, sleep disorders and mental illness.

But how can you open and rebalance Sahasrara again?

  • Meditate. Focus your attention on the top of the head and clearly set your intention of balancing the Chakra. Visualize the violet color when doing this. Thank the Universe and feel the connection to the Higher Being, since Gratitude and contentment are the simplest ways of strengthening this Chakra.
  • Aromatherapy. Floral essences such as Lotus, Angelica and white tulip when applied to the pulse points can aid the meditation process.
  • Yoga. Postures like Shavasana (corpse position) or Lotus position (Padmasana) are recommended for aiding the Crown Chakra. An advanced pose, the headstand or Shirshasan, also helps balance the Crown Chakra by increasing blood flow to the top of the head.
  • Practice silence. It is best for Crown chakra activation, because it does not distract from spiritual practice. The sound of Om and deep, tonal sounds can also be healing music for Sahasrara because of their universal nature.
  • Sunlight. The Crown chakra’s elements are thought and light, so spending time in the sunlight is good for opening it.
  • Work on these believes you may have consciously or subconsciously in order to figure out where they come from and solve them:

Crown Chakra Affirmations

I am part of the Divine.
I honor the Divine within me.
I seek to understand and to learn from my life experiences.
I cherish my spirit.
I seek experiences that nurture my spirit.
I listen to the wisdom of universe.
I trust my intuition.
I am open to letting go of my attachments.
I live in the present moment.
I am grateful for all the goodness in my life.
I love and accept myself.
I know that all is well in my world.
I am connected with the wisdom of the universe.
I am open to Divine wisdom.
My life moves with grace.
I am at peace.

Create your home made herbal remedy

Nowadays deciding to be treated only with herbal/holistic/homeopatic remedies is becoming a thing. People want to go back to the oringins, being more healthy and natural, find a way to cure themselves minimizing the risks and potential side effects. DIY is becoming generally very popular as well, maybe for the lack of trust in the health system or for feeding our curiosity and improve our own skills. No matter what are the reasons for both these tendencies, but I thought it would be interesting writing about it, combining the herbal remedies with the DIY side. Obviously you need some knowledge in order to treat yourself properly, so I suggest you to take these advices only if you have some experience or after you have spoken with a professional herbal therapist for the dosage and type of herb you may need to use.


Let’s start from the very beginning, so by collecting herbs from field or garden. For a number of good reasons you should gather your own herbs: you are assured of their freshness and potency, you also know their source, if they are clean, pure and wholesome. You will also save yourself money and gain self-sufficiency and with time you will build an increasing knowledge of plants and their medicinal uses. Although each herb is different and some may require unique handling, the following general principles can be used for gathering herbs:

  • Herbs are generally gathered according to their particular growth cycle: annuals (plants that have one growing season, the seed germinates the plant flowers and bears fruit and then dies), biennials (plants which germinate and establish a good root system during the first year, flower and bear fruit at the end of the second year, and then die ), or perennials (plants that live and bear fruit a number of years before they die).
  • Herbs must be gathered in dry weather, as those collected in moist or rainy periods are generally weaker and more apt to spoil.
  • Gather in the cool of the morning after the dew has evaporated or in the evening before the dew forms on the plant. Also before the sun is high in the sky.
  • Preferably gather wild plants from high, dry soils, exposed to clean air and abundant sunshine.
  • In all cases, gathering must be selective according to the type of plant and the part to be used (flowers, leaves, roots, etc.).

It is an excellent thing to do cultivating your own herbs in the garden, and I would encourage you to consider it, but try to be selective in the number of herbs you are going to grow. If you do not have enough time, space or knowledge, just purchase what you need from a health shop or a recognised herbal supplier. This is the most quick method to start herbalism.

Once collected your herbs, you need to know how to dry and storage them in a proper way, in order not to lose much of their medicinal value. Dry all herbs carefully outdoors (spreading a layer of herbs on a drying screen in the shade as quickly as possible), indoors (in a dust-free room, at mild temperature, on a drying screen covered away from direct sunlight) or with artificial heat (be very careful, oven drying under 38°C is difficult and often done improperly).

To store them, place them in a tight appropriate container, not made of formaldehyde or certain damaging plastic types, and seal with sealing wax to keep the air from getting to the herb. Always label and date them, and make sure they are used within a year. Never put them under direct sunlight or in room too hot or cold. If its a oil, use a brown bottle or can.

General guidelines should be also followed when starting making your own preparations, for example never use aluminium ware as it poisons with its gases and metallic acid, stainless-steel ware is the best because it does not break, although you should watch for over-high temperatures that cause burning.

It is time now to describe the most common various herbal preparations. Remember that dosages must be adjusted according to personal need.

Capsule: Take the herbal powders and other materials that, because of their nauseous taste or smell, would otherwise be difficult to administer, and place them into a soluble gelatin shell or capsule. These capsules are easy to buy and they are made in different sizes for easy swallowing, with numbers 1 to 4, 0, and 00 being the most common. To fill the capsule, simply take the two halves of a capsule apart and push these halves into the powder and towards each other, pressing the halves together again and at the same time compressing the powder. Dosage depends on the age, size, vitality, condition being treated, and the strength of the ingredients in the capsule itself.

Decoction: This is a process used with hard materials such as roots and barks, chips, etc. Decoctions are intended for immediate use within a twenty-four hour period (72-hour maximum limit when stored in a very cool place) and are generally made by pouring cold water upon fresh or dried herbs. The harder the material, the longer the simmering and extractive period will be. Consider to pulverize them first by mechanical means or pounding; next, soak the ingredients for twelve hours, then set this liquid on the fire and gradually heat to a slight boil. After the extractive period, drain off the liquid while hot and press the herb hard to make sure that all of the therapeutic ingredients are removed, then let stand until cool.

The usual preparation is 1 ounce of herb placed into 1 and half pints of cold water (the half pint will be lost in the extractive process). The herb and liquid is then brought slowly to a boil. The decoction differs from the infusion in that heat is applied and continued over a period of time, because roots and barks generally need longer heating to extract their active principles. When cool, pour off the clear liquid on top, separating it from the settlings and, finally, sweeten to taste. Add more water when decoctions are too strong. Dosage depends on age, size and temperament, but generally 2 fluid ounces to a cupful of liquid three times a day.

Infusion: An infusion extracts the active principles of herbs in water, or other fluid, without simmering or boiling;. Pour a liquid over the raw or powdered herb. The liquid may be hot or cold, but the flavour of the herb is generally much stronger and the action is much faster when made and administered hot. Generally a standard infusion is used with the lighter herbs (such as the leaves, flowers, etc.), and is made by placing one teaspoonful of finely cut dried herb or two teaspoonfuls of bruised fresh herb into a cup and adding boiling, distilled water; cover and let steep for 15 minutes; strain and drink.

Be sure to cover the vessel and stir occasionally, and then carefully strain off the clear liquid. Dosage varies according to type of herb and problem condition, but usually one cupful three times a day. Regulate the quantity to fit the patient’s strength, kidney problems, extreme debilitation, etc.

Oil: This preparation is made from the plant oils. For instance, with the mints (peppermint, spearmint, etc.), the oils come from the leaves. Many of these oils, when properly made (with olive oil), do not go into rancidity easily. The amount of herbs used depends upon the quantity of oil desired, but often a pound of fresh herbs to a pint of olive oil is used. Simmer the herbs for hours until the oil comes out of the herb. In the case of cloves, grind up fine, and simmer the powder in olive oil at a temperature of 50-65°C. Never use mineraloils. For olive oil, which is high in nutritional value, massage as much as the skin will absorb; it can be also used in small doses internally, except when for gallstones or kidney stones.

Ointment: It is a soft, semi-solid fatty herbal preparation used for a protective and emollient effect, liquefying when applied externally. Ointment bases are generally composed of various mixtures of waxes, animal and vegetable oils and the medicinal substances are mixed with them. Start with a melted base, such as olive oil and beeswax, and combine with herb. A good standard is 14 ounces of olive oil, 2 ounces of beeswax, and 1 pound of fresh or 1 and half pound of dry herbs. Place into a closed container, put into the oven and leave there at low heat (around 80°C) for 3-4 hours. Periodically, take a fork and lift the fresh herbs to see if they aregetting browned and brittle, and whether the oil has drawn the value from the herb. Vaseline as a base is generally inferior to animalor plant oils, but may be used if you do not want the preparation to be absorbed quickly into the skin.

Pill/Tablet: In this case the herbal agent is ground into a very fine powder and mixed with a mucilage of gum Arabic (made by dissolving gum Arabic in water), slippery elm, or a syrup, etc. which is then worked up into a pill mass. A portion is then cut off, sliced into small strips and then into smaller pill-sized pieces, which are then rolled into little round balls for easy administration. A small amount of powdered rhubarb or flour on the board in preparation will keep the mass from sticking, but keep the pill mass in a quite firm consistency, or else the excess mucilage or syrup will absorb too much rhubarb or flour.

Pills can be coated or uncoated, but the pearl-coated pill is a favourite and is readily soluble in the stomach. Pills are usually made so that one pill equals about 300-400 milligrams of the herbal compound. A pill differs from a tablet in that a pill needs mucilage or other substance added to keep the herbal agent in an adhesive mass, whereas the tablet will adhere by its own characteristics upon compression.

Poultrice: This herbal preparation is a soft, semi-liquid mass made of some cohesive substance mixed with water, vinegar or other substances, and used for supplying heat and moisture to an area, or to act as a local stimulant. Have the herbs ground or granulated. When using fine powder, just use enough moisture to make a thick paste, and when using the granulated form, a thick paste may be made with a mixture of water and cornmeal. If fresh green leaves are used, simply heat, bruise, triturate or chop the leaves up finely, and apply to the affected parts. Be generous in making poultices, covering the afflicted area thickly.

Spirit: It is an alcoholic or hydro-alcoholic preparation containing ordinary alcohol and a watery liquid that has been distilled from an alcoholic tincture or mash. It is a volatile prepared by distillation, whereas a tincture is prepared by infusing the volatile substance in alcohol. These are used as tonics, etc.  A few drops on up are used as specified.

Syrup: A thick, sticky liquid preparation made by dissolving sugar into distilled water, decoctions, infusions, juices, or other aqueous solution, and it is used to suspend medicinal or flavouring agents for easy administration alone, or to combine with other preparations. For making a syrup with herbs, settle out the heavier matter and pour off the clear liquid; then add to that 1 and 3/4 pounds of sugar, place into an appropriate vessel, heat until the sugar is melted, cool, and store for future use. Another formula for making a simple syrup is to pour 1 pint of boiling water over 2 and half pounds of sugar, place on a hot stove and stir until the liquid begins to boil, and then instantly remove. Dosage varies from 1 teaspoonful to 1 tablespoonful once or few times per day.

Tincture: This is technically a fluid extract, but the medicinal virtues are extracted into solution with grain alcohol or vinegar, which are better preservative for long term storage of extracts. Take approximately 4 ounces of ground dried herbs or 8 ounces of finely chopped fresh herbs and place them in a glass bottle with at least 16 ounces of alcohol or vinegar, until the herb is completely submerged under the liquid. This is tightly capped and each day for 10 days to 2 weeks the bottle is shaken vigorously at least 3 times a day or more. Extract all liquids, squeezing the herb residue thoroughly, with a regular juice press, or wring out by hand through cloth, etc.

After the liquid is extracted, place the tincture extract in dark or painted bottles, stopper thoroughly and store. When administering a tincture internally, you may evaporate the alcohol from the solution by putting it into hot water, or it can be taken as is. Dilute at least 1 teaspoonful of tincture to each cup of water.

What is Reiki?

The word Reiki is composed of two Japanese words: “rei” and “ki“. Translating Japanese into English is very difficult, especially if we are seeking a definition from a more spiritual context. In this case, Rei can be defined as the Higher Intelligence that guides the creation and functioning of the universe, both animate and inanimate things. It is available to help us in times of need and to act as a source of guidance in our lives. Ki is the non-physical energy that animates and flows in all living things, including plants, animals and humans. When a person’s Ki is high, they will feel strong, confident, and ready to enjoy life and take on it’s challenges. When it is low, they will feel weak and are more likely to get sick. We receive Ki from the environment and everything around us, like the air, light, etc.

So, Reiki can be defined as a non-physical healing technique made of life force energy that is guided by the Higher Intelligence. The source of health comes from the Ki that flows through and around the individual, rather than from the functional condition of organs and tissues. Reiki is a simple, natural and safe method of spiritual healing and self-improvment that everyone can use. It has been effective in helping virtually every known illness and psychological issue and always creates a beneficial effect, such as a deep relaxation. It also works with all other medical or therapeutic techniques to relieve side effects and promote recovery.

To administer Reiki, a practitioner channels life force energy through his or her hands unto another. The spiritual guidance enables the Reiki to flow through the affected parts of the subject’s energy field and charges them with positive energy. It raises awareness in and around the physical body where negative thoughts and feelings are contained. This causes the negative energy, such as stress, anxiety, physical pain, sadness, confusion, etc. to loosen its grip, allowing the touch of the Reiki healer to swoop in and clarify the energy pathways. A treatment feels like a wonderful glowing radiance that flows through and around you. This healing technique cannot be guided by the mind, therefore it is not limited by the experience or ability of the practitioner. Neither can it be misused as it always creates a healing effect, the worst it can do is nothing.

Reiki is different from almost all other healing modalities. It’s actually transferred to each student from a Reiki master during what is called an “attunement” process. This process opens the crown, heart, and palm chakras and creates a unique connection between the student and the teacher. Once you have received a Reiki attunement, you will have Reiki for the remainder of your life. It does not “wear off” and you can never lose it.

There are actually three or four levels of Reiki, depending on your teacher, for which one must be attuned before becoming a master:

  • Reiki Level 1: it is all about learning the history of Reiki, proper hand placements, the basics of how to use Reiki on others, and the practice of self-Reiki. This encourages students to use the technique on themselves in order to work through personal hardships.
  • Reiki Level 2: it is often defined by a focus on practicing Reiki on others, as well as an expanded opening of the energy channels. Additionally students receive the Reiki symbols and Level 2 attunement. The Reiki symbols allow the practitioner to connect more deeply to the universal energy, as well as draw on the qualities that the symbols represent. This includes the ability to provide distance in space and time treatments.
  • Reiki Level 3/Master: in many courses the Third Degree and Reiki Master are the same designation, because it is traditionally considered the teacher’s level.

Reiki is spiritual in nature, it is not a religion. It has no dogma, and there is nothing you must believe in order to learn and use it. Infact, Reiki is not dependent on belief at all and will work whether you believe in it or not.  Many people find that using Reiki puts them more in touch with the experience of their religion rather than having only an intellectual concept of it, but that is only up to you and your beliefs.

Most agree that Reiki has its origins back to the late 19th or early 20th centuries and the teachings of a Japanese monk named Mikao Usui. He had “rediscovered” this ancient concept of an inexhaustible energy source that can be harnessed for healing. Through attunements, a Reiki master (Usui was the first) can teach others to master this healing power as well. In 1937, a Japanese-American named Hawayo Takata brought the practice of Reiki to the West when she returned to her native Hawaii.

The secret art of inviting happiness,
The miraculous medicine of all diseases.
Just for today, do not anger,
Do not worry and be filled with gratitude.
Devote yourself to your work. Be kind to people.
Every morning and evening, join your hands in prayer.
Pray these words to your heart
and chant these words with your mouth.
Usui Mikao, Reiki: Treatment for the improvement of body and mind

Focus on: The Third Eye Chakra

Sanskrit name: Ajna – To perceive, to command
Element: All elements combined, light
Color: Indigo
Shape: Five pointed star
Petals of the lotus: Two
Rights: To see
Physical association: Eyes, base of skull, brow
Psychological function: Intuition, imagination
Challenge: Illusion
Plane: Plane of austerity, home of the blessed
Planets: Saturn, moon
Sense organ: Mind
Incense: Mugwort
Herb: Almond blossom


There are many ways to call it, but the most common Sanskrit name for the Third Eye chakra is “Ajna”, which means “command” and “perceiving”. This chakra infact is related to the “supreme element”, which is the combination of all the elements we know in their pure form.

Ajna is the sixth primary chakra in the body according to Hindu tradition. It is most commonly represented with the color purple or bluish purple/indigo but its auric color energy can also be seen as translucent purple or bluish white. The image of the Third Eye chakra symbol contains two elements frequently associated with wisdom: the upside down triangle and the lotus flower.

Located on the forehead, between the eyebrows just above the nose’s bridge, it is the center of intuition and foresight. It can also be described as being located behind the eyes in the middle of the head, where the pineal gland can anatomically be found. That is why Ajna is associated to the pineal gland, in charge of regulating biorhythms including sleep and wake time, center of attention because of its relationship with the perception and effect of light and altered or “mystical” states of consciousness. It is positioned close to the optical nerves, and as such, sensitive to visual stimulations and changes in lighting.

The energy of this chakra lets us experience clear thoughts as well as gifts of spiritual contemplation and self reflection, allowing us to access our inner guidance that comes from the depths of our being. It help us cut through illusion and to access deeper truths – to see beyond the mind, beyond the words. The “way of the Third Eye” is seeing everything as it is from a point of “witness” or “observer”, or from simply being mindful – moment by moment. It means examining self-limiting ideas and developing wisdom that comes from a perspective that transcends the duality of good or bad, black or white. It means seeing and helping others to see the deeper meanings of the situations in their lives.

Ajna is an instrument to perceive the more subtle qualities of reality. It goes beyond the more physical senses into the realm of subtle energies. Awakening your Third Eye allows you to open up to an intuitive sensibility and inner perception. When this chakra is fully activated, both hemispheres of the brain function in synchrony: the right hemisphere’s creativity and synthetic thinking is integrated and balanced with left hemisphere’s logical and analytical thinking. When your Third Eye is open, you not only see but you also understand.

On the other hand when it is closed or has an imbalance, it can manifest as: feeling stuck in the daily grind without being able to look beyond your problems, fantasies that appear more real than reality, indulgence in psychic fantasies and illusions, rejection of everything spiritual or beyond the usual, not being able to see the greater picture, lack of clarity. Instead physical manifestations of an overactive third eye chakra include headaches, vision problems, seizures, insomnia, nausea, sinus issues.

But how can you open and rebalance Ajna again?

  • Cultivate silence. Foster the silence of the mind, whether it’s through meditation, just sitting calmly in nature, or being absorbed in your favorite art or sport practice. Why? To be able to listen to the messages and information that comes through your Third Eye, you should be ready to perceive the whisper of its wisdom. If your mind is busy or noisy, you might miss its main message.
  • Hone your intuition. There are many ways to cultivate your intuition. So what about getting acquainted with your dreams and their meanings, perhaps giving a try at lucid dreaming, getting to know how to read a horoscope or tarot cards? Find new ways to intuit into your daily life activities.
  • Feed your creativity. Let your creativity flow freely by focusing on specific activities or letting your imagination loose. For instance, start learning a new art or craft; don’t try to be perfect, just let your inspiration run through your hands and be ready to be surprised by the results.
  • Yoga. Third Eye yoga poses include the child pose and the eagle pose.
  • Stones and jewerly. The key color is purple, like amethyst, black obsidian or purple fluorite. You can also purchase larger third eye crystals that will sit in your pocket or in the palm of your hand, allowing you to squeeze them and focus on them when you need to keep your third eye chakra open.
  • Meditation. Ajna meditation is just one of many ways to work on opening this chakra. And there are plenty of techniques for beginners, so don’t worry if you’ve never tried mindfulness or meditation. Here’s one to start with:
    1. Sit comfortably and close your eyes. Inhale and exhale ten times, slowly and deeply.
    2. Focus your attention on the location of the third eye chakra, imagine a violet sphere of energy in the middle of your forehead. Remember, purple is the third eye chakra’s color.
    3. As you continue to breathe slowly and deeply, picture the purple ball of energy getting bigger and warmer. As it does, imagine it purging negativity from your body.
    4. Think of yourself of absorbing the third eye chakra’s energy—allow yourself to feel it all over.
    5. Open your eyes when you feel ready.
  • Work on these believes you may have consciously or subconsciously in order to figure out where they come from and solve them:

Third Eye Chakra Affirmations

I am in touch with my inner guidance.
I listen to my deepest wisdom.
I seek to understand and to learn from my life experiences.
I am wise, intuitive, and connected with my inner guide.
I nurture my spirit.
I listen to the wisdom of elders.
I trust my intuition.
I forgive the past and learn what was there for me to learn.
I forgive myself.
I love and accept myself.
I know that all is well in my world.
I am connected with the wisdom of the universe.
I am open to inspiration and bliss.
My life moves effortlessly.
I am at peace.
I am the source of my truth and my love.

Comprehend Ouserlves through our Aura – Part 2

Last time I promised you to talk about the meanings of aura’s colors and how to start seeing them with your own eyes.

Remember that all living things radiate an aura from the energy they emit and that auras can reveal information about your thoughts, feelings and dreams. According to those, auras come in all colors, which can vary and can be light or dark shades. The ones closest to the physical body are the densest, gradually becoming more ethereal as they move towards the outer edges of the aura. It’s rare to have only one color in your aura, although it typically shows a predominant one.

For example, a young person aura is a wide span of red around the lower part and a narrow span of magenta/white at the head. As a person matures, the ampleness of the red in the aura, the colour which earths a person to this planet, begins to diminish and is replaced by the expansion of the spiritual colours of magenta and white. When the time comes for the transition of the soul through death, the red colour is practically non-existent, the aura now being totally filled with magenta and white.

  • Yellow

Relates to the spleen and life energy. It is the color of awakening, inspiration, intelligence and action shared, creative, playful, optimistic, easy-going. The Yellow Aura individual is a brilliant communicator, workaholic, confident in their skills, not suffering loneliness and have good observation skills. If brilliant yellow: positive awaken playful spirit; dark/brownish yellow: a student, pressured to achieve your goals and score high, with no more love for what he/she is studying; lemon yellow: someone with the fear of loss; pale yellow: individual with a new sense of excitement and hope for the future, embarked on a spiritual journey or discovered latent psychic abilities.

  • Orange

Relates to reproductive organs and emotions. The color of vitality, vigor, good health and excitement. People have lots of energy and stamina, they are creative, productive, adventurous, courageous, outgoing with social nature. Individuals which are normally good-hearted, kind and honest, can be hot headed and quick to lose their temper, successfull in life goals but sometimes impatient to start. If bright orange: very good health; orange-yellowish: a scientific mind and tend to be a bit of a perfectionist, mind challenger; orange-redish: great ego and self confidence.

  • Red

It is one of the most powerful colors found in an aura. It can be a positive or a negative element. Red represents blood, that’s why it represents the physical body, heart or circulation. The densest color, it creates the most friction. Friction attracts or repels; money worries or obsessions; anger or unforgiveness; anxiety or nervousness. If dark red: centered and grounded to the earth, self-sufficient, and able to survive any circumstance; muddied red: anger; cloudy red: powerful, energetic, competitive, sexual, passionate.

  • Pink

Pink indicates an artist, a loving sensual person who appreciates the finer things in life. If you’ve recently fallen in love, you’ll have a significant amount of pink in your aura. If dark pink: not trustworthy, this color indicates deceit, dishonesty, and an immature person.

  • Blue

This color represents the throat, specifically the thyroid. If your aura is blue, you’re intuitive, and you love helping people, a natural peacemaker. You remain calm during a crisis and others lean on you for support. If royal blue: highly developed spiritual intuitive or clairvoyant, very generous and giving spirit, open to new possibilities; dark blue: don’t trust the future and can’t face the truth due to your desire to take control; light blue: truthful and serene, and you excel in all fields of communication; indigo: relates to the third eye, intuitive, sensitive, deep feeling; turquoise: a powerful healer who helps others discover their inner truths. It’s usually found in doctors, healers, and counselors

  • Green

Green is the color of the heart and lungs. It is a very comfortable, healthy color of nature. When seen in the aura this usually represents growth and balance, and most of all, something that leads to change. This is usually found within the aura of teachers and people who work for the public good. If bright emerald green: healer, also a love-centered person; green yellowish: communicator, creative with art; forest green: tied to nature and use herbs in your healing practice; dark and cloudy green: a very jealous person and full of resentment, who refuse to accept responsibility for your own actions.

  • Purple

It is associated with the pituitary gland, pineal gland, and the nervous system. The most sensitive and wisest of colors,  the intuitive color in the aura, and reveals psychic power of attunement with self. Intuitive, visionary, futuristic, idealistic, artistic, magical individuals. If violet or lavender: a visionary of the highest level, someone who can daydream and change the world with spiritual love.

  • Rainbow

These auras are found in highly evolved spiritually persons, healers, especially those trained to work with the body’s energy fields. Rainbow auras are typically seen as shards of colorful light, resembling a sunburst.  Can be brilliant or pale, but usually a healer’s rainbow aura is often seen as colorful stripes radiating around the hands and head. Often the entire body of a healer or creative individual radiates a rainbow of colors that surrounds the person.

  • Silver

This is the color of abundance, both spiritual and physical. Lots of bright silver can reflect to plenty of money, and/or awakening of the cosmic mind. They are blessed and successfull. Silver people are attractive, exceptionally gifted, talented, lucky and have immense versatility and adaptability. If metallic silver: receptive to new ideas, intuitive, nurturing; dark or muddy grey: residue of fear is accumulating in the body, with a potential for health problems.

  • Gold

As silver, it is a very positive and spitirual color. It relates to the enlightenment and divine protection. When seen within the aura, it says that the person is being guided by their highest good, with protection, wisdom, inner knowledge, spiritual mind, intuitive thinker. The Gold Aura individuals are very attractive to other people and admirers, very charismatic, great listeners and generous, very proud and fiercely independent. Usually they hate to be criticised and cannot stand any of their flaws exposed.

  • Black

Black auras indicate you’re holding on to negative feelings. Draws or pulls energy to it and in so doing, transforms it. It captures light and consumes it. Typically, it indicates an unwilling and unforgiving spirit, long-term unforgiveness (toward others or another) collected in a specific area of the body, which can lead to health problems (abortion if near ovaries or uterus). It can also indicate past life hurts.

  • White

White typically indicates a newness and purity, reflects other energy, it’s a pure state of light. Often represents spiritual, etheric and non-physical qualities in a person, transcendent, higher dimensions, purity and truth, angelic qualities. It can be found in highly spiritual people who’ve transcended the physical and are preparing to ascend. If there are white sparkles or flashes of white light: angels are nearby, or it can indicate that the person is pregnant or will be soon.


The possibilities of what you might see by looking at someone’s aura are endless. And learning to read and protect your own aura can be important to your physical, emotional and spiritual health. You don’t have to be a mystic to read an aura. In fact, it’s widely believed we all have auric-sight (the ability to read auras) and could see them easily when we were children, but them we lost the ability to focus on more mental tasks.

Anyway, seeing auras can be developed with practice. First, you begin to learn how to see your own. At the beginning, you will only be able to see the lower layers of the Aura, with time and practice, you will develop the ability to see the higher levels as well. For this exercise, you will need a quiet room with a white wall, preferably at dusk time, when the light is low and the eyes need to switch to night vision. With time and practice, you will be able to do this exercise during daylight or in any other light conditions and eventually without using the white background.

  1. Begin by sitting down across from the white wall. Your back should be fully supported by a chair, your feet flat on the ground. Connecting to your breath, take a few minutes for relaxation.
  2. Extend one arm, palm facing the wall, fingers together. Soften your gaze as you look at your hand. Hold this soft gaze for 30 seconds and you will begin to see energy field surrounding your hand.
  3. Slowly spread your fingers apart. Continue with the soft gaze looking at your fingers and the space between your fingers. What do you see?
  4. With time and practice, you will begin to see and outline around your hand and around your fingers. At first, it may appear as a heat wave, almost colorless field, later on, you will begin to see different colors of your aura.
  5. Patiently observe. There is nothing to strive for. Just being here, in the moment, focusing softly on the hand, on the fingers, and the space between the fingers.

You can do a similar excercise but in front of a mirror. Look into it and look in the center of your forehead between your eyebrows. When done at the correct distance for you (up to 18 feet), you’ll be able to see an aura and its colors.

After having practised for a while on yourself, you can try looking at someone else’s aura, using them as partner in the exercise.

  1. Have your partner stand against the white wall, not touching it, just standing very close.
  2. Stand away from your partner so that you can see her from head to toe, including white space behind them.
  3. Feel your feet firmly planted on the ground and connect with your breath. Close your eyes for a few seconds.
  4. Open your eyes and with a soft focus look at your partner in a way that encompasses their whole body. Gaze softly, passively noticing whatever arises. There should be no striving to see anything, just allowing whatever arises in the moment.
  5. You will begin to see the energy field around the head and upper body. This is the area of the body that is easiest to see. At first, it will appear colorless, like a heat wave. With time, you will begin to see colors and you will no longer need a white background.

But before starting practising you have to consider few things:

  • Know when it’s time to cleanse. We pick up other people’s energies without even being aware of it. When those energies are negative, they affect our aura negatively (for instance, you’re feeling irritable and anxious for no apparent reason while you’re out with your friends having fun). Even if your aura doesn’t seem out of balance, it’s a good idea to cleanse it periodically to release any negative energies.
  • Cleanse your aura. Focus on your root chakra located at the base of your spine and associated with the color red. Then envision yourself engulfed in a shower of brilliant gold light radiating down from the sun. Let the light penetrate your body and your aura. Hold this image for some time. Then envision a violet light extending from the soles of your feet to the top of your head. See and feel it as a warm, protective blanket and believe that it has the ability to heal and protect any gaps in your aura. At this point, the cleansing and healing process is underway, and you should feel yourself becoming stronger, releasing negative energy and feeling more at peace. Meditate on this feeling for a while. Use some music in the background to relax.
  • Protect your aura. You can take other steps to protect and strengthen your aura. These include the cleansing meditation written above, massage, create a shield by meditating, invisible negative cord cutting and reiki energy meditation.
  • Use ethics while reading and healing auras. When you learn how to see auras, you may be tempted to share everything you see with other people. Aura colors change throughout the day, with each emotion, blockage in the body, thought pattern, energy levels and the flow of prana through the body. So, what you see in the moment is just that, in this moment. You need to be careful about interpreting aura colors of other people. Why? For two reasons. First, when you see the aura of someone else, you are seeing it through your own aura. You are seeing it through your own perceptions, your knowledge, and your beliefs. Jumping to conclusions may not be wise. Use your heart, your mind, and your soul to guide you. Second, once you develop the skill of seeing auras, you will be able to see auras around people anywhere on the street, in shopping mall, at work. Seeing somebody’s aura is like looking into someone’s bedroom and intruding on their privacy. It should not be done without the person’s consent.

Sad but true, it may take a while before you start seeing progress, but don’t give up and keep practising, that is the key! I will be glad to know your own experience, so remember that feedbacks are very much appreciated.

Enjoy your new vision!

Natural Hair Care and Treatments

Spending too much on expensive shampoos, conditioners, oils etc. but not getting the desired results that you see in TV ads? It is mostly possible and very common. First, because TV results are obviously overly exaggerated. Second, there an ugly truth we all need to face: hair care is very personal. What works for one person doesn’t necessarily work for another. That’s why I decided to write this post and share some tips to my audience, hoping that following these easy and simple beauty advices for hair will give that strenght and shine all of us are looking for!

1. Egg treatment
Use the entire egg to condition your hair. If you have dry or brittle hair, use egg whites to moisturize your hair. Use ½ cup of any egg mixture (egg white, entire egg) and apply to clean, damp hair. Leave it for 20 minutes and rinse with cool water. You will immediately notice changes.

2. Avoid hot water
I know, it’s hard. But try to skip hot water showers, because hot water will make your hair dry and brittle as it strips protective oils from your hair. Thus, prefer a temperature which is just a bit warmer than your body temperature.

3. Bottle gourd treatment
Extract some bottle gourd juice and apply it into your hair. Keep this solution for half an hour and wash it off thoroughly. This is one of the simple beauty tips for hair that would do wonders.

4. For that shiny soft hair
Prepare a mixture of 1 cup of your daily conditioner and 2-3 tablespoons of honey. Apply this mixture evenly on your wet hair. Leave it for 30 minutes and wash it off thoroughly. This mixture will close down your hair’s cuticle and give your hair 
that amazing shine.

6. Baking soda therapy
Quite a common and well known beauty therapy. Make a mixture of 3 tbsp of baking soda and some water. Rinse your hair with this solution after shampooing. Let it set in for at least 5 minutes before the final rinse. This therapy will help to remove the excess shampoo and styling product from your hair.

7. For bouncy hair
Apply a one to one mixture of warm water and apple cider vinegar to your hair. Rinse it thoroughly after 5 minutes to get rid of the apple cider smell.

8. Don’t wash your hair frequently
Wash your hair every 2-3 days, for proper regulation of natural hair oils. Washing your hair less often will also help regain your hair’s naturalbody and luster.

9. For strong hair
Use almond oil to treat dry and damaged hair. It is a very simple procedure, pour some almond oil in a bowl and heat it for 40 seconds. Then evenly distribute on your hair. Leave it for 30 minutes and then rinse normally with shampoo and conditioner using cold water.

10. Say bye-bye to dull hair with lemon juice
After the final rinse, apply 1 tbsp lemon juice to your hair. Simply towel dry your hair and style as normal to get rid of dry hair.

11. Treat sun damaged hair
Make a mixture of ½ cup honey, 1-2 tbsp olive oil and 1-2 tbsp of egg yolk. Apply this mixture on your hair for 20 minutes and then rinse with warm water. This treatment will help to replenish keratin protein bonds.

12. Moisturize your hair
Pour a little beer in your wet hair. Distribute evenly and massage your scalp with your fingers for 20 minutes. Then rinse it thoroughly to get rid of the beer smell. Do this procedure once a week, but it is recommended that people with sinus and cold should avoid using this treatment.

13. Do not brush wet hair
Wet hair is three times weaker and thus more likely to break. He recommends, towel dry your hair first and then gently detangle your hair using a wide tooth comb. Also, you should get your hair trimmed at least every six weeks to eliminate dry, split ends.

14. Let your hair air-dry
Allow your hair to dry by itself instead of using a blow-dryer or hot rollers. Using this artificial mode of drying technique will make your hairmore brittle and dry. If you have no time to let your hair air dry, then use blow-dryer sparingly and make sure you use a warm setting instead of a hot setting.

15. Use a miracolous home-made Aloe Vera mask
Against hair fall: Mix two tbsp. of fenugreek tea into one cup of aloe Vera gel. Blend both the ingredients so that you get a smooth paste which is easy to apply and easy to wash. fenugreek is very famous as it makes hair shiny, smooth and thick when used regularly. Apply this hair mask for 30-45 minutes and the rinse out the mixture.

For dry hair: Take 4-5 tbsp. of fresh aloe Vera gel, 3 tbsp. of coconut oil and mix it with 2 tbsp. of honey. Mix everything well and apply this on your hair in root to tip direction. This is a hydrating hair mask and if your hairs are dull and dry then this will nourish them deeply. Keep this mask for 20-25 minutes and then wash off.

For shiny hair: You need 2-3 tbsp. of fresh aloe Vera gel, 2 tbsp. of yoghurt, 1 tbsp. of honey and 2 tbsp. of olive oil. Mix all the ingredients well in a bowl and then apply it on your scalp. Massage your scalp for initial 10-15 minutes and then let it stay for extra 25 minutes. This hair mask will promote hair growth and it also reduces dandruff problem. Repeat it 3-4 times a month.

Reduce and prevent dandruff: Take one cup aloe Vera gel, 2 tbsp. of ACV and one tbsp. of honey. Mix it well and then apply it on your roots and strands. Rinse out the mixture by shampooing regularly. Do this 2 times a month to get rid of dandruff completely.

For hair growth: You need one cup of aloe gel. Add tow tbsp. of castor oil and powdered fenugreek of each in the aloe Vera gel. Mix these ingredients well; you can also blend it in a blender to get a smooth paste for easy application. After everything is mixed start applying it on your roots and strands. Cover your head with shower cap and keep it overnight so that the hair-mask can penetrate deeply. This mask is highly conditioning, nourishing and it also promotes hair growth.

Focus on: The Throat Chakra

Sanskrit name: Visuddha
Element: Akasha
Color: Blue
Shape: Crescent
Petals of the lotus: Sixteen
Rights: To speak
Physical association: Throat, ears, mouth, shoulders, and neck
Psychological function: Communication
Identity: Creative identity
Challenge: Lies
Plane: Human plane
Planets: Mercury
Incense: Frankincense
Herb: Chamomile


The Throat Chakra is the fifth chakra and it is the first of the higher or spiritual chakras on the “chakra ladder”. Located at the center of the neck at the level of the throat, it is the passage of the energy between the lower parts of the body and the head. “Visuddha”, which means “pure” or “purification”, is related to the element of sound. Through the throat, sound is propagated into the air and its vibration can be felt not just in our ears, but also in our whole body. That’s why the function of the Throat Chakra is driven by the principle of expression and communication.

The Throat chakra is most commonly represented with the color blue turquoise or aquamarine blue. And its symbol is composed of a circle with sixteen petals, a crescent with a circle inside of it and, sometimes, it is symbolized by a circle containing a downward-pointing triangle in which is inscribed another circle. The most commonly accepted location for the fifth chakra is at the level of the throat. It’s important to remember that this chakra is multidimensional and is often represented as going out of the front of the throat, and going in the back at a slight upward angle.

As a communication center, it not only allows you to express who you are and what you stand for, but also allows you to listen deeply to another. Infact, the gift of this chakra is accepting your originality, expressing your authentic voice and speaking your truth. The energy of this chakra allows you to seek knowledge that is true, beyond limitations of time and space, beyond cultural and family conditioning. A person with an open Visuddha Chakra is a good listener, enables another person to have the experience of being heard, one of the most profound human needs. He/she has also good sense of timing and the propensity to create and projecting ideas, realizing his/her vocation and purpose in life.

The main challenge for the fifth chakra is doubt and negative thinking. A Throat Chakra blockage can also manifest as the inability to express and realize your truth in the world, which can significantly impact your ability to achieve your goals and being able to communicate effectively with others for fear of ridicule and judgement. Lack of control over one’s speech, speaking too much or inappropriately, not being able to listen to others, imperceptible voice, not being able to keep secrets and telling lies are just some of the manifestation of problems related to Visuddha.

But how can you open and rebalance it again?

  • Be blue. Using chakra colors to support or stimulate the fifth chakra opens up a whole array of possibilities. For example, incorporating the color blue into your decor at home and work is a nice, subtle way to bring focus to the throat chakra. The calming effect of this color of wisdom and honesty can help open up and heal a blocked fifth chakra. Wearing precious or semi-precious blue stones is a great boost for chakra healing and balance. Meditating on the color blue also helps alleviate throat chakra imbalance.
  • Yoga for the Throat Chakra primarily focuses on simple neck movements, such as moving you head from side to side, can help ease tension that can block it.
  • Sing and drink water. These are great Throat Chakra cleanser.
  • Clear the air. At-home aromatherapy can help dispel negativity and restore balance to the chakras. Consider introducing one or a combination of these scents to heal and activate your fifth energy center: jasmine, rosemary, sandalwood, calendula.
  • Write it down. Learning how to express yourself without censoring or editing can be valuable. Practice mindful self-expression by journaling. Get it all out on paper and let it sit, then revisit what you have written at a later time.
  • Talk it out. Talk openly with close friends and family. Make it a point to be open and honest with all you say. Simply speaking in a heartfelt way can work wonders to strengthen and balance the throat chakra. Speak the truth with love.
  • Let it be. Letting go is difficult. Holding on to things over which you have no control can lead to resentment, guilt, and anger — all of which contribute to an imbalance of the throat chakra.
  • Work on these believes you may have consciously or subconsciously in order to figure out where they come from and solve them:

Throat Chakra Affirmations

I am open, clear and honest in my communication.
I have a right to speak my truth.
I communicate my feelings with ease.
I express myself creatively through speech, writing or art.
I have a strong will that lets me resolve my challenges.
I nourish my spirit through creativity.
I live an authentic life. I have integrity.
I love to share my experience and wisdom. I know when it is time to listen.
I express my gratitude towards life.
I listen to my body and my feelings to know what my truth is.
I take good care of my physical body.
I am at peace.

Discovering your Life Path through Numbers

I bet that some of you have already heard something about “Numerology”. You can call it as you prefer, an art, a science, a faith, but basically when we talk about “numerology” we refer to belief in the divine, mystical relationship between a number and one or more coinciding events. It is also the study of the numerical value of the letters in words, names and ideas. It is often associated with the paranormal, alongside astrology and similar divinatory arts.

Skeptics argue that numbers have no occult significance and cannot by themselves influence a person’s life. Skeptics therefore regard numerology as a superstition and a pseudoscience that uses numbers to give the subject a veneer of scientific authority. Whether you are part of this group or not, you can certainly not deny that sometimes the word “coincidence” is really forced in.

If you would like to believe or even if you are just a bit curious, there are many many exercises or tests you can do with numbers. I will talk about these again but today I chose to focus on the “numerology life path”.

The most important date in your life for numerology purposes is the day of your birth.  The also called “Number of Destiny” is a number that is obtained by adding numbers of your birth date: day, month, and year. In the Western numerology, it is called “The Life Path Number”. The numbers used in numerology to indicate one’s life path number run from 1 to 9 and Master Numbers 11, 22, 33.  Master numbers have double power of single digits. These numbers are given more challenges and, in return, have greater potential.

Your Life Path Number is something you were born with, it is indicating what you should do about your life. It shows you what your nature is and what capabilities you have to work directly with the flows of the universe.

The method of Life Path calculation is based on the theory that the path consists of Three Cycles, which are represented by the year, month, and day of your birth. They represent the later, middle, and early part of your life, respectively. Your Life Path (or your life’s cycle, as it is often referred to) is described by a single digit number. It is influenced by all the traits and properties revealed in each Cycle.

It is very easy to calculate your Life Path number, you just have to reduce each unit of your birth date (month/day/year) to a single-digit number or a Master number (remember, Master numbers are 11, 22 and 33!). Next, add each of the resulting digits (or Master numbers) together and reduce the total again to a single digit, or a Master number. For example, if you were born on October 12, 1936, you would calculate your Life Path as follows:

Month: October is the 10th month of the year. 10 reduces to 1 (1 + 0 = 1).

Day: The date of birth is 12. 12 reduces to 3 (1 + 2 = 3).

Year: The year of birth is 1936. 1936 reduces to 1 (1 + 9 + 3 + 6 = 19, then 1 + 9 = 10 and finally 1 + 0 = 1).

Now add the resulting single-digit numbers: 1 + 3 + 1 = 5. The Life Path number in this case is 5.

Let’s see the messages for each Life Path. I encourage you to do your own research, so you will be able to learn even more about yourself and your path.

Life Path 1 – Leadership

Your purpose is to develop and master innovative creativity, confidence, independence, originality, and achievement. Understand that these “themes” will be reoccurring issues throughout your life. Your Life Path number indicates what you’re evolving into, developing, aspiring toward, and learning about. So while you’ll display innate gifts and talents in the areas of emphasis, you’ll also experience some consistent obstacles as you master your life’s purpose.

Life Path 2 – Peacemaker, collaboration

Your purpose is to develop love, harmony, balance, cooperation, and diplomacy. Understand that these “themes” will be reoccurring issues throughout your life. Your Life Path number indicates what you’re evolving into, developing, aspiring toward, and learning about. So while you’ll display innate gifts and talents in the areas of emphasis, you’ll also experience some consistent obstacles as you master your life’s purpose.

Life path 3 – Creativity

Your purpose is to develop creative self-expression, emotional sensitivity, joy, and inspired communication. Understand that these “themes” will be reoccurring issues throughout your life. Your Life Path number indicates what you’re evolving into, developing, aspiring toward, and learning about. So while you’ll display innate gifts and talents in the areas of emphasis, you’ll also experience some consistent obstacles as you master your life’s purpose.

Life path 4 – Practical, trustworthy

Your purpose is to develop process, security, stability, and work hard to meet your goals. Understand that these “themes” will be reoccurring issues throughout your life. Your Life Path number indicates what you’re evolving into, developing, aspiring toward, and learning about. So while you’ll display innate gifts and talents in the areas of emphasis, you’ll also experience some consistent obstacles as you master your life’s purpose.

Life path 5 – Freedom, adventures

Your purpose is to develop fearlessness, adventurousness, resilience, and the constructive use of freedom. Understand that these “themes” will be reoccurring issues throughout your life. Your Life Path number indicates what you’re evolving into, developing, aspiring toward, and learning about. So while you’ll display innate gifts and talents in the areas of emphasis, you’ll also experience some consistent obstacles as you master your life’s purpose.

Life path 6 – Humanist, family

Your purpose is to develop nurturing, balanced responsibility, acceptance, service to others, and visionary pursuits. Understand that these “themes” will be reoccurring issues throughout your life. Your Life Path number indicates what you’re evolving into, developing, aspiring toward, and learning about. So while you’ll display innate gifts and talents in the areas of emphasis, you’ll also experience some consistent obstacles as you master your life’s purpose.

Life path 7 – Explorer, knowledge

Your purpose is to develop spirituality, data-driven analysis, intuition, trust, and openness. Understand that these “themes” will be reoccurring issues throughout your life. Your Life Path number indicates what you’re evolving into, developing, aspiring toward, and learning about. So while you’ll display innate gifts and talents in the areas of emphasis, you’ll also experience some consistent obstacles as you master your life’s purpose.

Life path 8 – Wealth, power

Your purpose is to develop your positive relationship with money, power, control, and authority. You’re here to experience the satisfaction that comes with financial abundance and material achievement. Understand that these “themes” will be reoccurring issues throughout your life. Your Life Path number indicates what you’re evolving into, developing, aspiring toward, and learning about. So while you’ll display innate gifts and talents in the areas of emphasis, you’ll also experience some consistent obstacles as you master your life’s purpose.

Life path 9 – Philanthropy, compassion

Your purpose is to develop spirituality, humanitarianism, creativity, wisdom, and integrity. Understand that these “themes” will be reoccurring issues throughout your life. Your Life Path number indicates what you’re evolving into, developing, aspiring toward, and learning about. So while you’ll display innate gifts and talents in the areas of emphasis, you’ll also experience some consistent obstacles as you master your life’s purpose.

Life path 11 – Spiritual Messenger

With the 11/2, it’s all about experiencing intensely challenging circumstances in your life and coming out the other side stronger, more spiritual, and ready to help others who have experienced similar issues. It won’t be easy and yet it’s profoundly deep and gratifying when you tap into your high-level of artistic creativity and psychic gifts. Understand that your contribution is through the experience you provide for others, which is almost impossible to measure. You must learn to trust that the “butterfly effect” you have on people is immeasurable and that you’ll never know the way in which you change people’s lives through your loving heart, intuition, and artistic expression.

Life path 22 – Master Builder

With the 22/4, it’s all about breaking out of your safety and security zone and making more of an impact in the world around you. Know that this is rather scary and somewhat foreign for you because you gravitate toward the tried-and-true and erring on the safe side. Yet know that the Master Number 22/4 is the most powerful number in Numerology. (Did I just hear you “gulp?”) Yes. It’s a rather big deal. You’re meant to achieve and build something that makes a difference on a grander scale —and that won’t feel comfortable. You must blast past your childhood wounds, through and around your very real (and also your self-imposed) limitations, and work tenaciously to define and achieve your goals.

Life path 33 – Master Teacher

With the 33/6, it’s all about coming to terms with your need for perfectionism and control and instead using your talent for inspired creativity to help and heal others—wherever they happen to be in their life journey. Honestly, I find that this Life Path number is tremendously challenging and can try the patience of a Saint—because let’s face it—it’s a rather “saintly” job description! It’s a delicate balance between your over-weaning sense of responsibility (or irresponsibility) and joyfully diving into using your emotionally sensitive and creative gifts in the service of others. This is an intense Life Path and takes a lifetime to understand and act upon in a constructive way. It’s not only service-oriented, it’s also highly creative.

The Healing Technique of Hand Reflexology

Every single part of the human body is connected through the nerves through feet, hands and ears“. This is what the ancient healing technique of reflexology believes.

According to this principle, the different organs in the body have nerve endings that culminate in the palms of the hands and the soles of the feet. These nerve endings and their associated organs have been identified by reflexologists and divided into various zones or pressure points. Any disfunction or blockage in the organs causes pain in the associated pressure point and when this one is stimulated, the blockage is removed and the organ returns to its proper function.

If you would like to compare, the prime difference between the hand reflexology and foot reflexology is that the first one uses the key points in the hands, instead of the feet, for stimulating the nerve to relieve tension, stress and imbalances of various connected parts/organs. Hands are also more flexible and the reflexes are much deeper beneath the skin as compared to the feet where the reflexes lie close to the skin surface. This means that one needs to reach deeper and hold for a longer time period in hand reflexology to stimulate a point in the hand as compared to the feet reflexology, where the effect in much efficient and quick.

Nowadays our hands are perhaps the most active parts of the human body, as most of our daily activities involve the use of the hands in a more sedentary lifestyle. It is no wonder that most people’s hands and bodies are in such agony! Hand reflexology is actually a natural form of alternative massage therapy that targets the key body zones of your body right from the palm of your hands. There are people who get instant relief from various conditions by doing this and even more who get gradual benefits only by doing it daily.

Studies conducted to measure the efficacy of this olistic massage have shown that it is beneficial for the whole body circulation and heart and produces the same positive effects on the brain as meditation. Plus, reflexology can help you to beat stress. It is also used to treat diseases and conditions such as constipation, headaches (migraine or sinus induced), and asthma.

Hand reflexology is a popular and easy self-massage technique. A simple massage takes only about ten minutes and it does not require any special oil or lotion, unless you want it, but only thumb, finger, and hand massage movements. One should be familiar with a hand chart, which is a graphic display of how each part of the body is represented in both hands. Using this chart as a guide, you can focus the massage on specific problem areas.

hand-small-reflexology

By following a series of simple steps, an easy hand reflexology self-treatment can be performed. You should follow these steps first on the right hand, followed by the left.

  1. Sit in a comfortable chair in a quiet room, use relaxing music, pillows, incense or candles as you wish. Enter a state of relaxation using a bit of your favorite oil hands, if you like.
  2. Rub the cream on your hands for several minutes until completely absorbed. This will relax your hands and increase flexibility in preparation for applying reflexology. Be sure not to use a cream or oil greasy your hands are not slippery.
  3. Close your eyes and focus on any area of your body where you feel an uncomfortable pain. Sometimes you just feel as if some part of your body feel misaligned.
  4. Consult a hand reflexology map to identify the points of reflection in your hands that correspond to the parts of your body you want to work.
  5. Firmly press the reflex point you need to stimulate. You can gradually increase the pressure to make sure you’re “activating” the reflex, but loose a little if you feel some pain.
  6. Hold the pressure for 30 seconds and release. Wait a few seconds and repeat. You can press either 30 seconds or you can press and release the point of a pulsed for 30 seconds.
  7. Use your thumb to apply light pressure technique pressure if you are uncomfortable. To do this, use a circular motion over the same point of reflection for about 5 seconds, then rotates in a circular in the opposite direction for 5 seconds. Repeated several times for each point of reflection.
  8. Reflexology applies to all areas in both hands, but lend him more attention on problem areas.
  9. When you’ve finished your reflexology session sit quietly for at least 10 minutes. If possible, lie down and rest well for half an hour.
  10. Drink several glasses of water after applying reflexology. Water will help to drain the toxins released from your organs and muscles during the session.


Picture taken from: http://www.massageiraniyan.ir/fa/galleryfa/the-pictures/category/1-anatomy

UPDATE

Dear Abundy's supporters and friends, It is with sadness that I have to announce the temporarily closure of Abundy Studio due to unexpected circumstances. During this time you can stay tuned and read the Abundy blog, but all the treatments will be suspended until further notice. Hopefully we won't stay close for long! Thank you for your understanding and support. With Love and Gratitude.